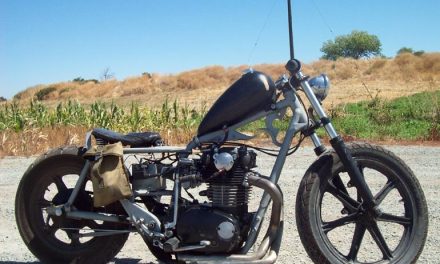
As of late, I have been trying to gather pics and information to start some low buck garage tech tips. One of the easiest and cheapest mods to do, would have to be lowering the front forks. When lowering my forks a few months ago, I attempted to take a couple pics of the whole process. As I sat down to write this very article, I realized that I do not have what it takes to make a full article from beginning to end. In usual form, I failed miserably at taking the time to stop and snap pics of each step. With my camera in hand, I start to step into the garage to snap some photos of the whole process (again). Right before – I get past the threshold, I recall a full write-up archived at one of the forums I frequent. The Chopper Underground. In order to make sure credit is given where it is due, I would like to personally thank Justin for his willingness to put together such a well written/pain free step by step. He was gracious enough to allow it to be placed here at XS650chopper.com for all of you chopperfiends to see and learn from.
Send in a How To article. Use the submission form here.
What year is your bike? – See the xs650 Model Year Identification Chart.
THE PROPER WAY TO LOWER YOUR XS650 FORKS
AND SO THE JOURNEY BEGINS…..
To disassemble the tubes from the slider, you will need an 8mm allen wrench for the bottom of the slider and a 17mm allen to hold the damper rod in place. I did not have the 17mm allen, but I did have an extra fender bolt that fit the bill perfectly.

I used red lock-tite (permanent) to secure the acorn nut to the bolt, which ensures the two will not separate before the damper rod does. I then used a 17mm socket attached to a series of extensions to place the acorn into the damper rod.
Now that you have fashioned a suitable tool for the damper rod, we proceed to dissasembly. The first step, is to take all the preload out of the fork tube cap. This will lessen the chance of your cap shooting across the room and putting out an eye. This is done with a large regular screwdriver. You will need to push down hard while turning, until it comes to 1/4” below the surface of the cap.
You will now need to lift bike so the front wheel is off the ground. Now you can remove caps. It will pop up a little bit when it unthreads fully. Do not lose the solid washer underneath the cap. Do this with one or both trees still fastened so the tubes do not rotate. Pull out the fork springs and set aside. Loosen the pinch bolts on trees, and remove forks/sliders. Drain oil from tubes.
Now place slider in a vice. I used the mounts for the caliper and some blocks of wood as to not scar the aluminium.

Place socket and 17mm allen tool into fork tube and the 8mm allen wrench in bottom of slider. Mine worked out to the socket wrench hit the bench, so I didnt even have to hold it in place. I also used a small cheater bar (3/8” socket extension) on the 8mm allen wrench.
This bolt is locktited from the factory, and will give resistance all the way out. I would advise using blue loctite during reassembly. Once the 8mm bolt is removed, you can slide the fork tube out of slider.
The damper will slide out of the top of the tube, and the small damper spacer will come out of the bottom of the tube. Clean all of the internal parts as you disassemble, to rid them of sludge from ancient oil.

By now you should have your forks dissasembled and ready to make your desired lowering spacer. I used a tube from an old dumb bell, that is 1” o.d. and 20mm i.d. (never throw metal away). Here is lowering spacer installed on damper rod below the small spring.

A comparison to the stock fork assembly.
Here is what needs to be cut off the large spring. The springs in these are progressive. Which means it has a tighter coil pattern at the top, compared to the bottom. I will be cutting the spring from the botom, so I can keep the progressive action of the spring.

By now, you should have your spacer made to desired length, and be ready to cut your larger spring. I chose 1/4” shorter than than the length of lowering spacer, which equals 2”. Just to clarify my spacer was 2 1/4” making 1/4” of extra preload on the springs. I bought a 10” metal cut off blade for my chopsaw.
It was $5 at Lowe’s.
A small price to pay for an accurate cut on a spring. I set up a stop block on my saw to 2”, including the width of the blade.

now my springs fit 3/4” lower than the tube, which is 1/4” higher than stock.

Now is a good time to shave your sliders of any unused tabs before your final reassembly. Do not forget to add blue loc-tite to the 8mm allen bolt during final reassembly. It may seem that the bolt cannot come out due to the axle placement, but the damper rod may unscrew from the inside resulting in a tragic wheelie.
This concludes your XS650 front end lowering class.
For more articles check out the XS650 Chopper Do It Yourself Library
Justin
If you have any extra tips or possible slight differences you have seen between different year forks, feel free to comment below and let it be heard. Once again Justin, I appreciate your effort and time as well as many others.
Thanks


