Hack the xs650 yamaha charging system –
The banshee alternator swap
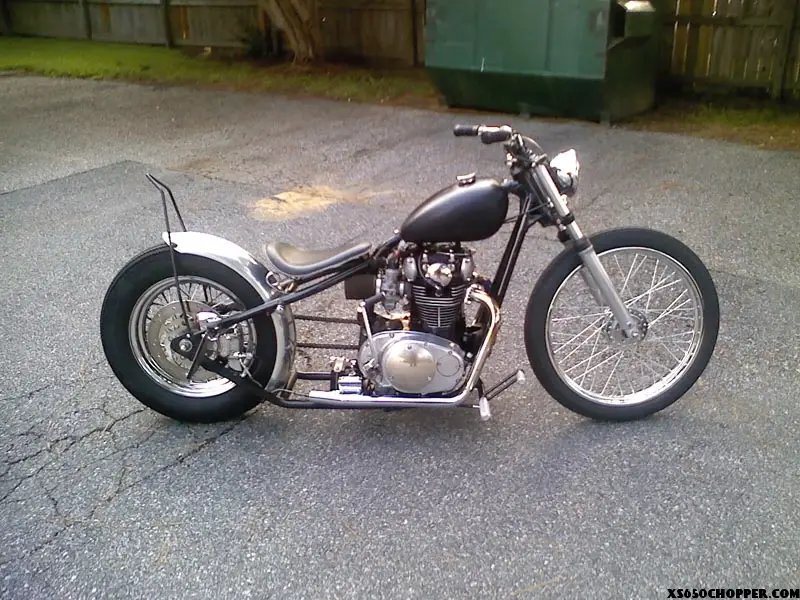
Ted- The xs650 charging system is the weak link in a otherwise bulletproof machine. I know a number of guys have successfully run a Yamaha banshee magneto alternator in place of the stock OEM charging system with no problems. I’ve run this particular set up on my Bike for the past year. A little over a year ago Hugh sent in some pictures of his rephased-xs650-chopper which also runs the banshee alternator setup. Hugh put this article together on how to do the The banshee alternator swap.
Hugh- Your stock charging system WILL FAIL YOU at some point, and it is $$$$ to fix, and you’ll likely have trouble again. The stock XS650 charging system is terrible for many reasons. It requires nearly 40 Amps just to “Turn-On” the system. Sucks for almost dead batteries. It won’t charge at idle and uses a brushed alternator style system – Charging requires contact of moving parts.
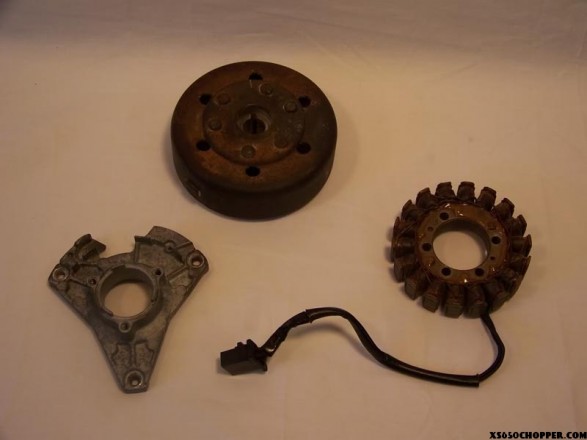
Reason to swap to the good stuff: Will charge at idle, Non-Contact system (nothing to wear out) No Battery required, will need a condenser if not using a battery. You can sell the stock stuff (if it still works) to some schmuck on Ebay and probably pay for this whole swap plus a cheap 6 pack!!
- Here is what you will need:
- Used Parts:
1. YFZ350 Banshee Stator Bracket – Usually about $10-20 on Ebay Any year will work.
2. 3 Phase Stator – Can be found on ebay new or used. List of useable stators below.
3. YFZ350 Banshee Flywheel. Any year will work.
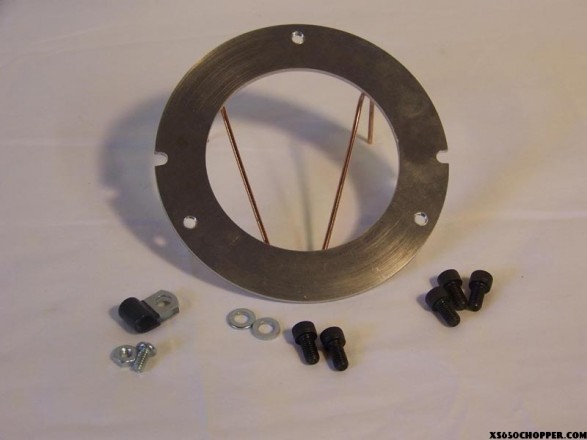
1. Mounting Plate for Stator. Contact Hugh’s via PM or Click here to order.
2. 3 Phase Regulator – I have a connection to get these new cheaper than most can be found used.
3. 5/8″x3/16″ woodruff key – Can be found at Lowe’s Hardware for under $1
4. Use your stock battery, or a capacitor. OR, you can have the best of both worlds and use a tiny 12Volt gel battery.
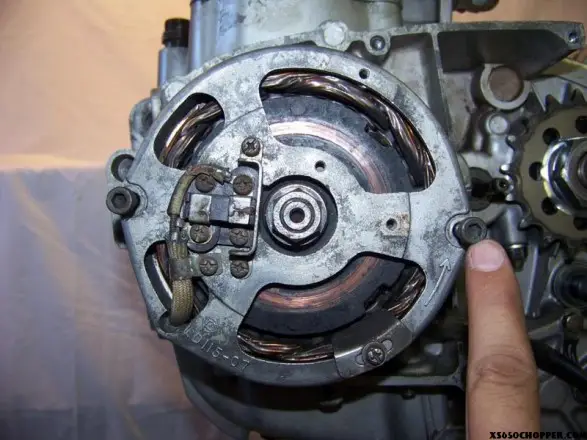
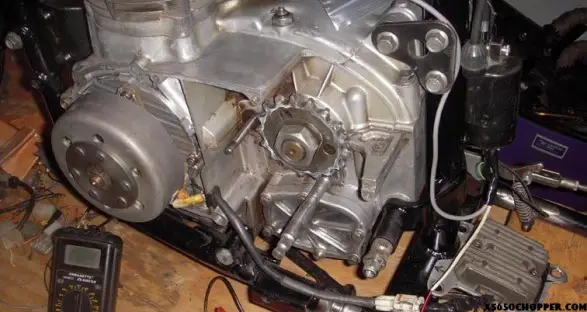
The stock OEM charging system.
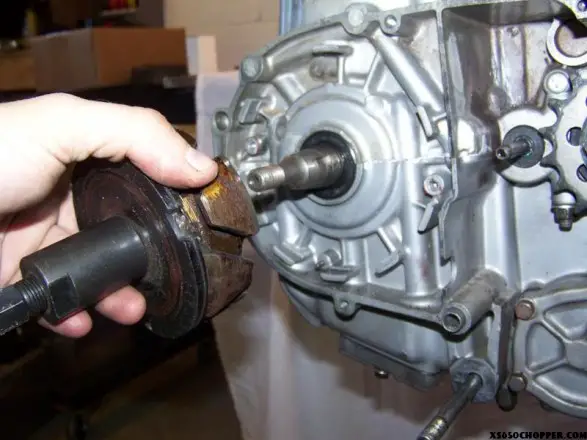
Pull the rotor.
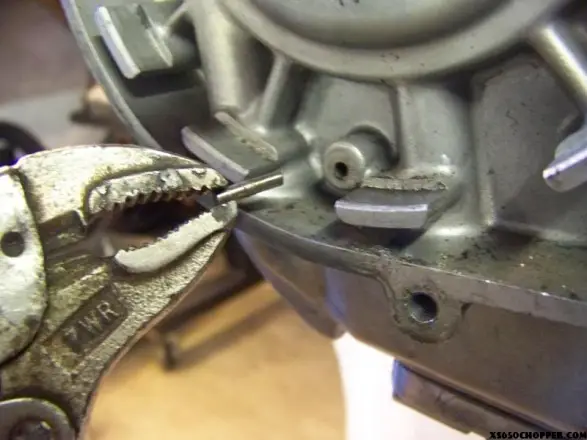
Then pull the pin at the bottom of the case.
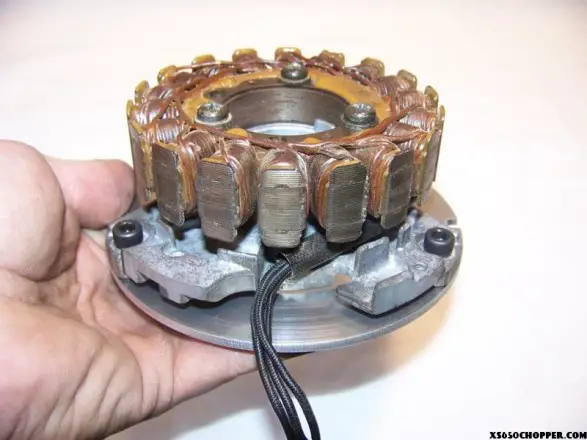
Assemble the Banshee Stator Bracket to the Aluminum Disk supplied in the kit using the supplied hardware. No washers are needed, but a little red lock-tite is recommended. Once assembled and modified, it should look like this. (Hardware will be included in the package, just not shown here)
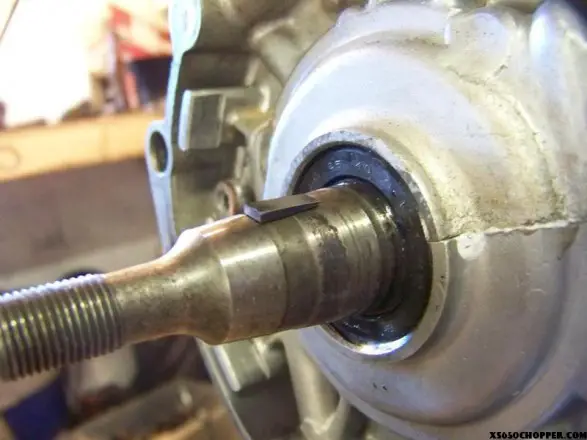
At this time you will need to modify the Woodruff key mentioned in the list of needed parts. The Banshee Flywheel uses a 3/16″ key, while the XS650 crankshaft uses a smaller key. This took about 5 minutes with a good file.
The Woodruff key is the small part on the crankshaft. When you install it on the crank, it should fit like this. Feel free to loosely slide on the flywheel to test fit as you are working on this step. I like to use a little grease to hold these in place during final assembly.
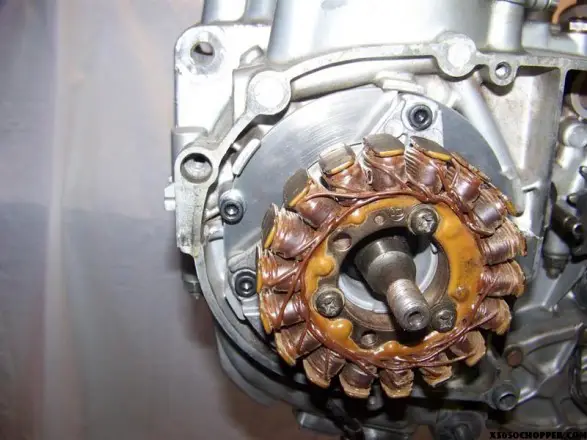
Once you have the key installed on the crank, its time to install the Stator Assembly. Use the supplied bolts and washers. It should look like this. Use a little lock-tite during final assembly, but right now you are just mocking it all up… There is an important step later you’ll not want to miss.
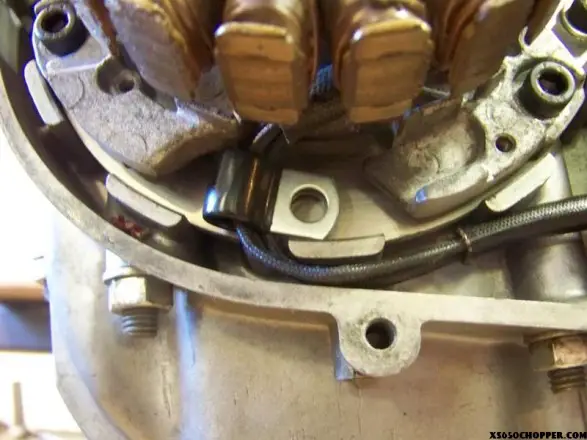
Now, you’ll want to make sure that the wiring is secured.
I have found that not all stators are wired equally, so I didn’t have the disks cut for this operation, its all on you. Don’t worry, its easy. Slip the supplied wire clamp over the 3 stator wires and position it in a place out of the way and routed to where they won’t be clamped, rubbed, chaffed, etc..
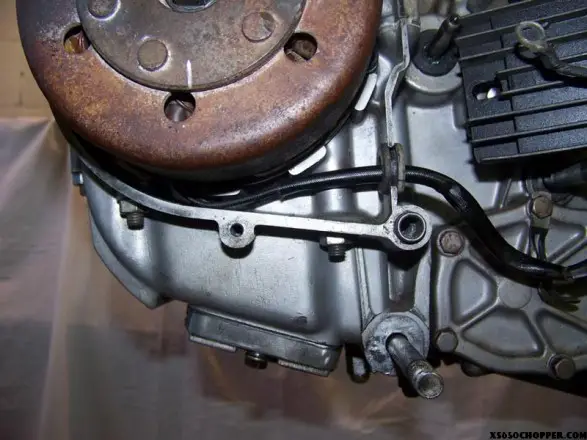
Now you will just be slipping on the Banshee Flywheel, carefully lining up the woodruff key to the notch on the flywheel as you go. Make sure the wiring is free and clear, but there is plenty of room, so don’t stress too much.
Reinstall your cover, route wires away from the chain (duh) and reinstall your controls and all that mess you took off to get started.
(Ted- Use loctite on final assembly or the world will crash on your head)
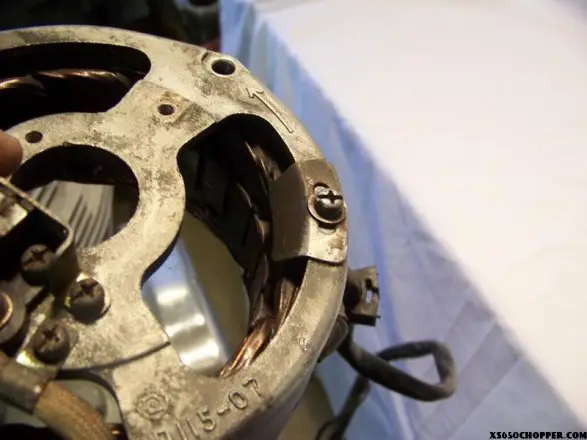
Now you’ll be ready to pull the old alternator cover off and steal the timing marks off of it.
(Not all xs650 have this steal timing marks)
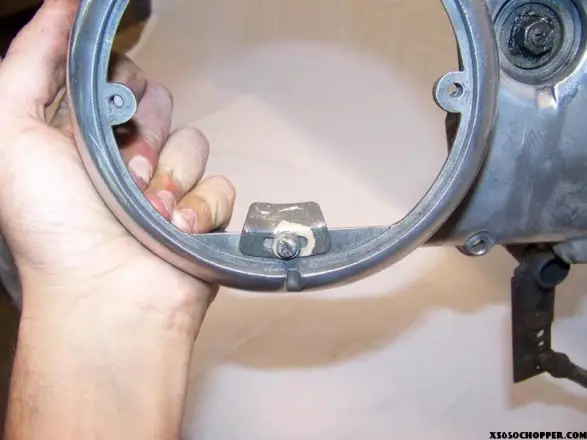
You’ll find that the stock timing tabs will fit nicely on the side cover.
Drill and tap a 4mmx.070 hole and use the stock screw to fasten it to the cover.
You can again use a through hole and a bolt/nut if you want.
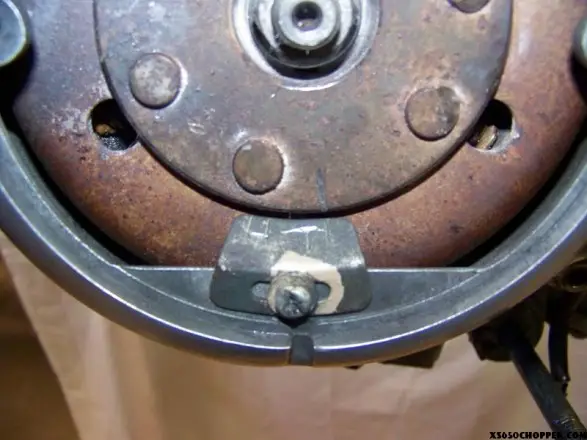
Slip the side cover back over the cases. Locate TDC by looking through the spark plug hole, using a special tool whatever you want. Mark the Flywheel with a corresponding cut to T on the timing tab.
It doens’t have to be perfect, because once you start the bike back up, you can slide the tab back and forth while using your timing light to the “Fire” location.
I marked it first with a marker/pencil. Then I cut a notch into the flywheel using a dremel, file, whatever..
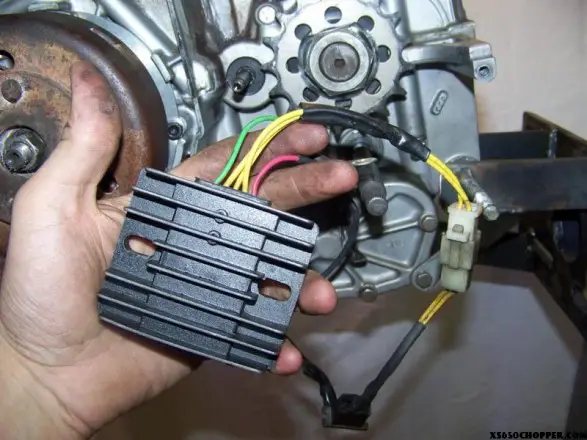
Wiring is now the the only major thing left.
Hook up the 3 wires coming from the Stator to the 3 yellow wires on the regulator. It doesn’t matter which wire go where, just make sure all the yellow wires are used.
Red goes to the battery/condenser and green is a ground. You are all done.
Obviously you’ll need to mount the regulator somewhere, but this is all for the how-to.
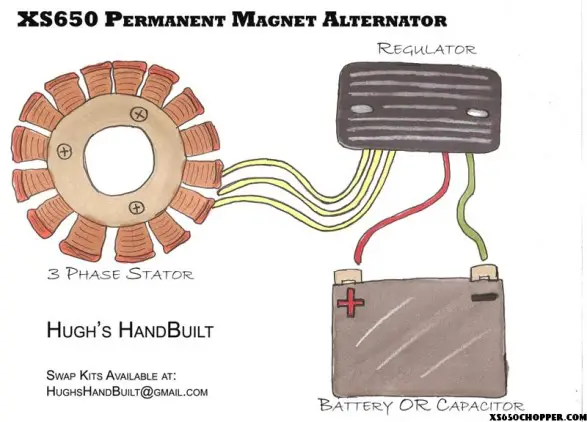
Wiring diagram. This is ONLY for the charging system, the rest of the wiring on your ride is up to you.
NOTES: If you are using a TCI ignition, you’ll need to change over to points or Pamcopete’s awesome setup before doing this modification. You’ll get the timing working first, get it all timed properly and use the timing marks from your setup to reinstall the timing tab on the side cover.
Here is the list of sourced Stators that should work.
I’ve never had to buy a new one for any reason, they work just fine used off of ebay/CL. I stole this list from another source, be sure to double check bolt patterns and that a Stator has 3 Yellow wires coming out of it (mine had 3 black, but it works just the same, you just need a 3 Phase Stator)
MAKE SURE TO GET THE CORRECT PART NUMBERS FROM A STATOR!!! THIS LIST IS NOT 100% ACCURATE.
CORRECT STATOR MEASUREMENTS SHOULD BE 103mm X 42mm X 20mm
YAMAHA (ESR080)
Honda CBR600 F1 86-90
Honda VF500 84-85
Kawasaki VN800 Vulcan 00-05
Kawasaki VN800 Classic 01-06
Kawasaki VN800 Drifter 01-05
Kawasaki ZL600 86-87
Kawasaki ZX600, ZX-6 Ninja, ZZR600 85-04 [!!NOT ZX6-R, ZX6-RR 98+!!]
Suzuki VS800 92-07
Suzuki VX800 90-93
Suzuki VZ800 97-04
Suzuki LT250 91-96
Suzuki LT4WD 91-96
Suzuki LT-F4WD 91-98
Yamaha XV250 Route66 88-90
Yamaha XT600 90-95
XS650 Permanent Magnet Alternator Swap Kits – ONLY $27.50.
They are Laser Cut from 6061 Aluminum and make the swap a breeze.
They are currently $27.50 shipped in the US and include hardware and instructions.
For an additional $42.50 I can include a brand new regulator to work with this system.
Don’t get stuck using the stock system, it will fail you, and it is $$$ to repair.
I do cranks, cams for the rephase. I also have Fork Lowering kits as well.
Hughs
HughsHandBuilt@gmail.com
hughshandbuilt.blogspot.com

