
You want a Milan-level beard that reads as precise, polished, and unmistakably intentional. This article walks you through ten barber-tested grooming secrets used in Milan’s top shops so you can shape, maintain, and present your beard with the same refined attention to detail those barbers apply every day.
You’ll learn practical techniques, tools, and simple routines that deliver salon-grade results without overcomplicating your morning.
Expect clear guidance on blending short sides into a fuller chin, sharpening symmetrical cheek lines, choosing the right shave tools and products, and adopting small habits—like targeted oiling and weekly masking—that elevate definition and texture. PRO TIP
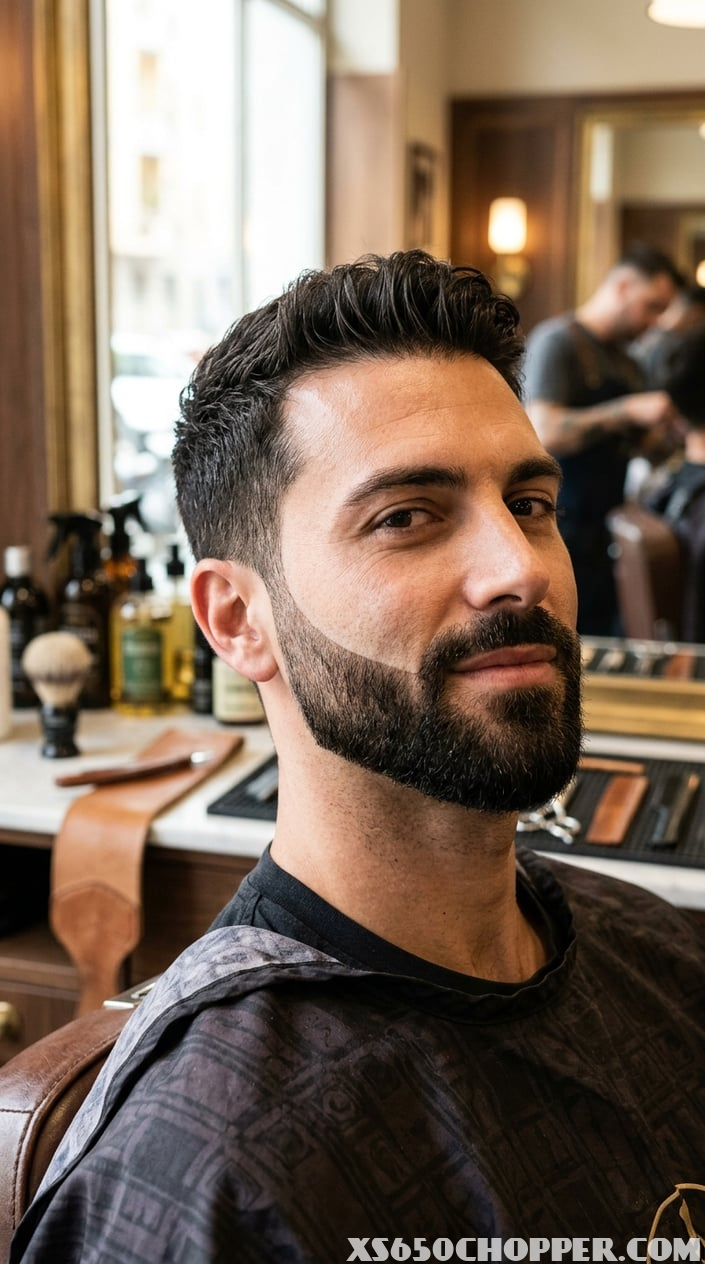
1) Master the Italian Fade: short sides blending into a fuller chin

The Italian fade relies on a clean contrast between short, tapered sides and a fuller, shaped chin area. You keep the cheeks and sideburns neat while allowing more length and fullness toward the jawline to create that classic, sculpted silhouette.
Start with clippers and a selection of guards to build a smooth gradient. Work from the lowest guard at the sideburns up to longer guards as you move toward the chin, using light, upward flicks to avoid hard lines.
Use a trimmer or razor to define crisp edges along the cheek and neckline. Sharp lines make the fade read as intentional; softer, blended edges can work too if you prefer a more natural look.
Maintain balance by checking symmetry frequently and adjusting length to suit your face shape. A deeper chin can handle a fuller beard, while rounder faces benefit from slightly more length on the chin to elongate proportions.
H3
PRO TIP
Keep a small detail trimmer and a blending comb handy for home touch-ups between barber visits. Trim conservatively—you can always take more off, but you can’t grow it back quickly.
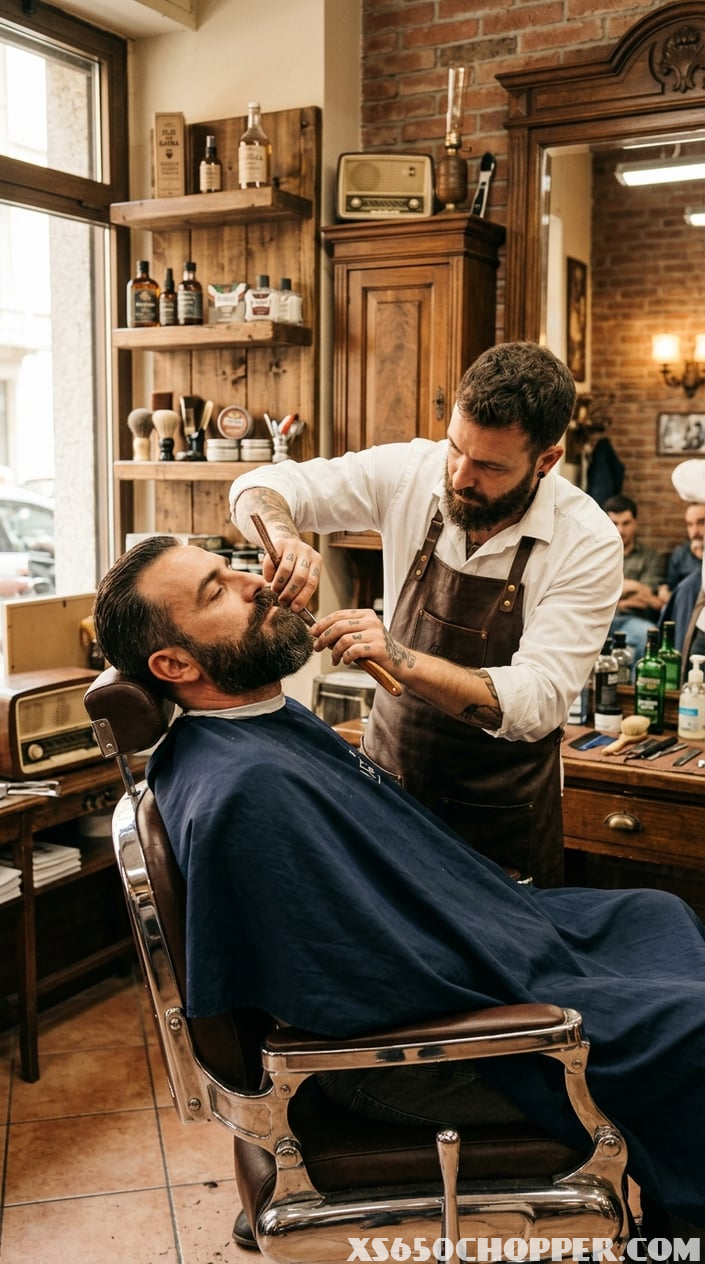
2) Ask for a Precise Cheek Line: symmetry-focused razor edge
Tell your barber you want a clean, well-defined cheek line and point to the exact angle you prefer. Milanese barbers value symmetry, so they’ll measure and match each side rather than eyeballing it.
A sharp razor or a single-edge safety razor creates the crisp line you’re after. These tools give the barber fine control along the cheekbone and near the mustache, minimizing stray hairs and soft, uneven edges.
Stand naturally and relax your jaw when they work. Tension or an artificial expression can lift skin and shift the line, so a neutral face helps produce a true, repeatable edge.
If you want to check symmetry yourself, ask for a mirror and a step-back view before the final shave. Small adjustments are normal; good barbers trim progressively and compare both sides to keep things balanced.
Protect the skin by asking for warm lather and a light pre-shave brush stroke. This softens hair and reduces tugging, letting the razor glide for a smoother, irritation-free finish.
PRO TIP
Bring a photo of the cheek line you like. Visual references speed communication and help your barber match the precise angle and height you want.
3) Use a GilletteLabs Heated Razor for salon-style hot-shave finish

A heated razor delivers a warm, consistent heat along the blade so you get the hot-towel effect with each stroke. That warmth helps soften whiskers and open pores, which can make the final pass smoother and reduce tugging.
You’ll feel the difference especially on short stubble or when defining edges. The heat can help the blade glide and give a closer, more comfortable finish than a cold razor on dry skin.
Keep your skin clean and slightly damp before you shave to get the best results from the warming element. Too much water cools the blade; too little and the warmth won’t penetrate as effectively.
Change cartridges regularly and check the blade for nicks to avoid irritation. A premium heated razor still relies on sharp, well-maintained blades for a precise, salon-style finish.
PRO TIP
Warm the skin with a hot towel or run your heater briefly before using the razor to amplify the hot-shave sensation. Use light, controlled strokes and rinse the blade often to maintain consistent heat and a tidy edge.
4) Train the Verdi/Balbo Shape: keep mustache separated from beard
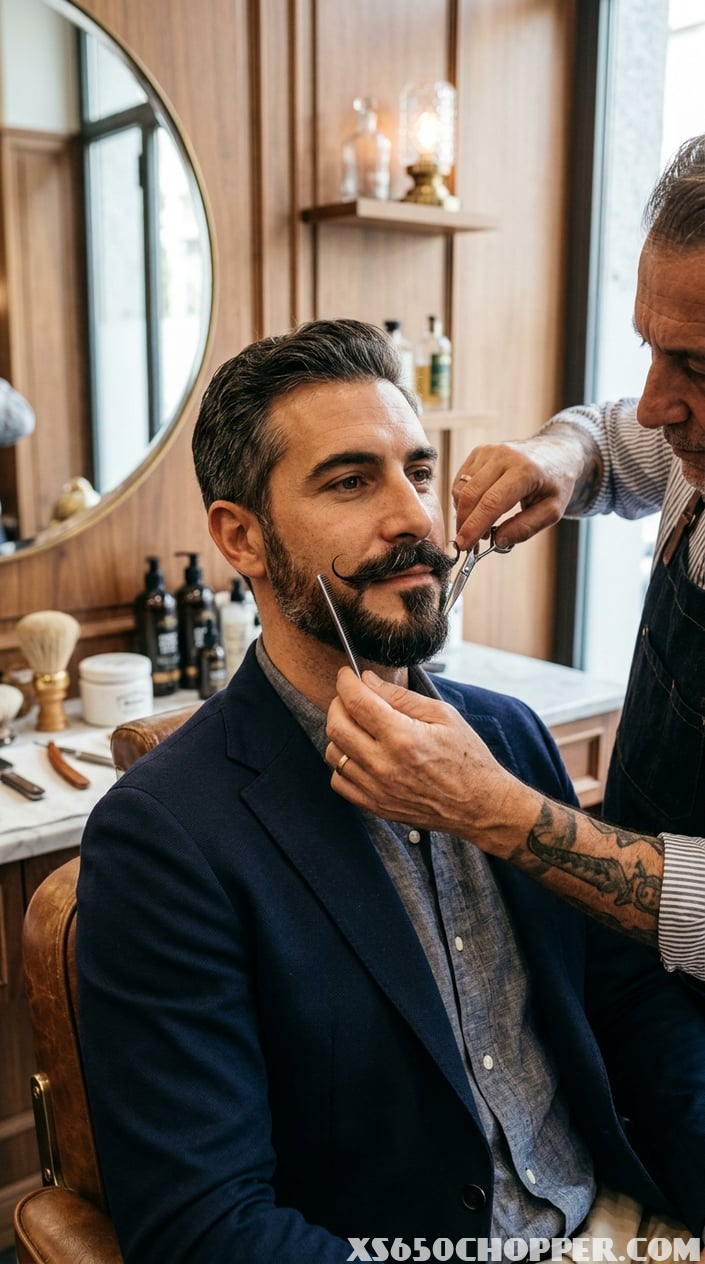
Keeping the mustache visually separate from the beard gives you a cleaner, more intentional look. The Verdi and Balbo both rely on that disconnect: a defined, often fuller mustache sitting apart from a sculpted chin beard or rounded bottom.
Start by mapping the shape with a trimmer or razor. Define a clear horizontal line under the nostrils or along the philtrum depending on the style you want, and remove stray hairs that bridge the mustache and beard.
Trim the mustache to its own length and style it independently. Use a small comb and scissors for precision, or a dedicated trimmer guard; aim for a fuller, styled mustache for Verdi, and a neater, tailored mustache for Balbo.
Sculpt the chin area separately. For Balbo, maintain a disconnected goatee with clean cheeks and removed sideburns; for Verdi, keep a rounded, fuller bottom with short sides. Regularly shave the cheeks to preserve that separation.
Use product to reinforce the divide and tame flyaways. A light wax or pomade shapes the mustache without making it merge into the beard, while beard oil on the chin area keeps the texture distinct and healthy.
Train new growth by repeating the separation routine every few days. Hair naturally wants to fill gaps, so consistent trimming and styling teach the lines to hold and make maintenance quicker over time.
PRO TIP
When growing in, let the mustache reach full thickness before committing to a heavy disconnect. Thicker mustaches read better as a separate feature and make the Verdi or Balbo more striking.
5) Apply Proraso Pre-Shave Cream before trimming for smoother cuts
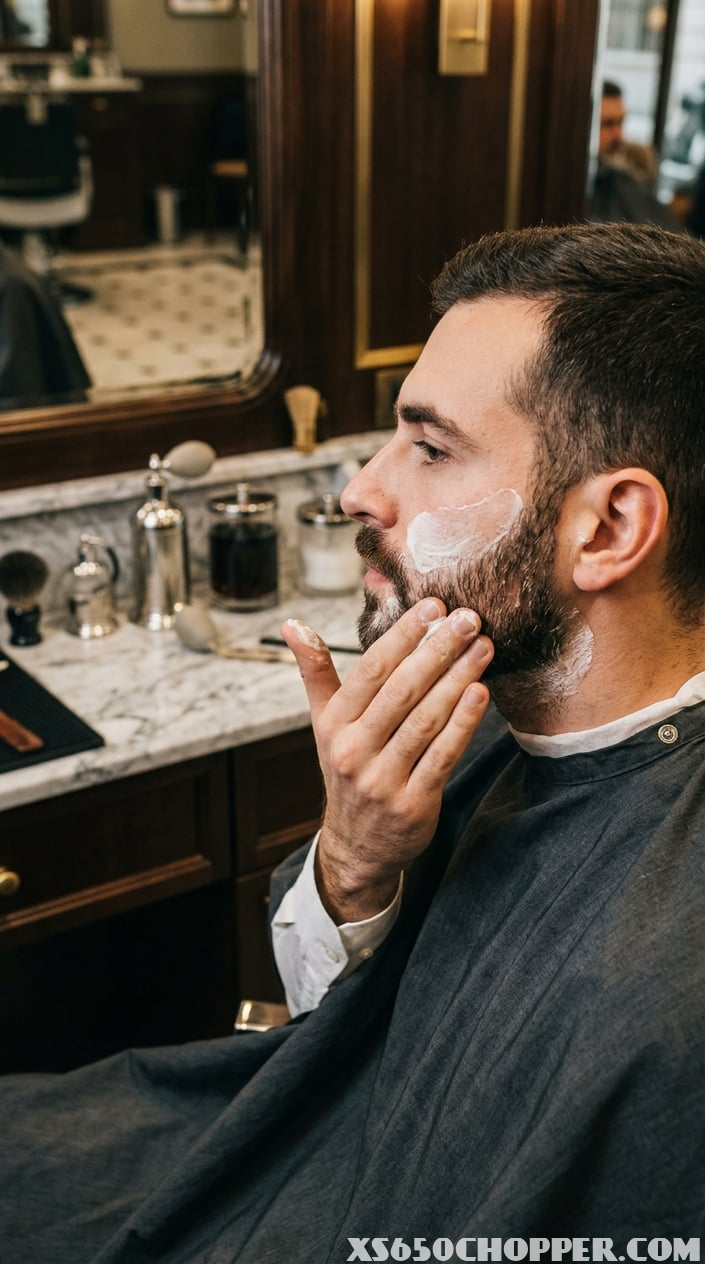
Using a pre-shave cream softens coarse beard hairs and makes trimming easier. You’ll notice clippers glide with less tug, which reduces uneven cuts and stray snags.
Proraso’s formula with oatmeal and green tea hydrates the hair and soothes the skin. That protective layer helps prevent irritation, especially if you trim daily or have sensitive skin.
Work the cream into damp beard hair for best results. Rub a small amount between your fingers, massage it through the growth, and let it sit for a minute before you start trimming.
Trim in the direction of growth at first, then refine against the grain if you want a closer finish. The pre-shave cream gives you better control and a cleaner edge when you go back for detailing.
PRO TIP
Use a comb to distribute the cream evenly and lift hairs before running your clippers. This helps you see lines clearly and achieves a more consistent length across the beard.
6) Daily Beard Oil: use Honest Amish Classic Beard Oil

Using beard oil daily softens hair and hydrates the skin beneath, which prevents itch and flakiness. Honest Amish Classic Beard Oil blends organic carrier oils like jojoba and argan to condition both hair and skin without heavy residue.
Apply oil after a warm shower while your beard is slightly damp. That helps the oil absorb faster and distributes evenly from roots to tips.
Start with 2–4 drops for short beards and 6–10 for longer, thicker beards. Rub the oil between your palms, work it into the skin first, then comb through the beard to spread product and tame stray hairs.
Honest Amish has a subtle, natural scent that won’t overpower cologne. It’s lightweight enough for daily use and pairs well with other grooming products.
PRO TIP
If you have patchy areas, focus the oil on the skin where growth is sparse to improve skin health and create the appearance of fuller, better-maintained facial hair.
7) Weekly Clay Mask for jawline definition (salon-grade)

Using a salon-grade clay mask once a week tightens pores and reduces surface oil that can blur the sharpness of your beard line. You’ll notice the skin under your jaw looks cleaner and firmer, which helps the beard edges read as crisper.
Choose a kaolin- or bentonite-based mask formulated for normal-to-oily skin. These clays lift impurities without over-drying; look for products with added glycerin or aloe to maintain hydration.
Apply the mask after a warm shower when your pores are open. Smooth a thin, even layer over the jawline and chin and leave it on for the manufacturer’s recommended time—usually 8–12 minutes—to avoid irritation.
Rinse with lukewarm water and pat dry, then follow with a lightweight, non-comedogenic moisturizer. Hydration balances the temporary tightening effect and prevents flaking along your beard line.
If you have sensitive skin, do a patch test on your neck before first use. Stop if you get sustained redness or stinging; mild tightening is normal, but prolonged burning is not.
PRO TIP
Use a small fan brush or silicone spatula for precise application along the jawline. That keeps the mask from migrating into beard hair and makes cleanup faster.
8) Trim with a 1.5–3mm clipper guard on the cheeks for clean taper

Using a 1.5–3mm guard on the cheeks creates a neat, gradual taper that frames your jaw without looking harsh. Start longer near the sideburns and move downward and inward to blend into the main beard length.
Work in short, controlled strokes and keep the clipper flat against the skin to avoid uneven patches. Check symmetry often by stepping back or using a mirror at different angles.
If your cheek hair is sparse, use the shorter end of the range to keep the transition subtle and natural. For denser growth choose closer to 3mm to preserve fullness while still defining the cheek line.
Keep the blade clean and oil the clipper before trimming; a well-maintained tool cuts more evenly and reduces tugging. Move the trimmer slowly where you want a softer blend, and speed up slightly where you need a firmer edge.
PRO TIP
Use a comb to lift hairs away from the skin as you trim to catch stray longer strands. Trim one side, then the other, and finish with small touch-ups to ensure both cheeks mirror each other.
9) Comb with a Kent Handmade Pocket Comb to sculpt direction
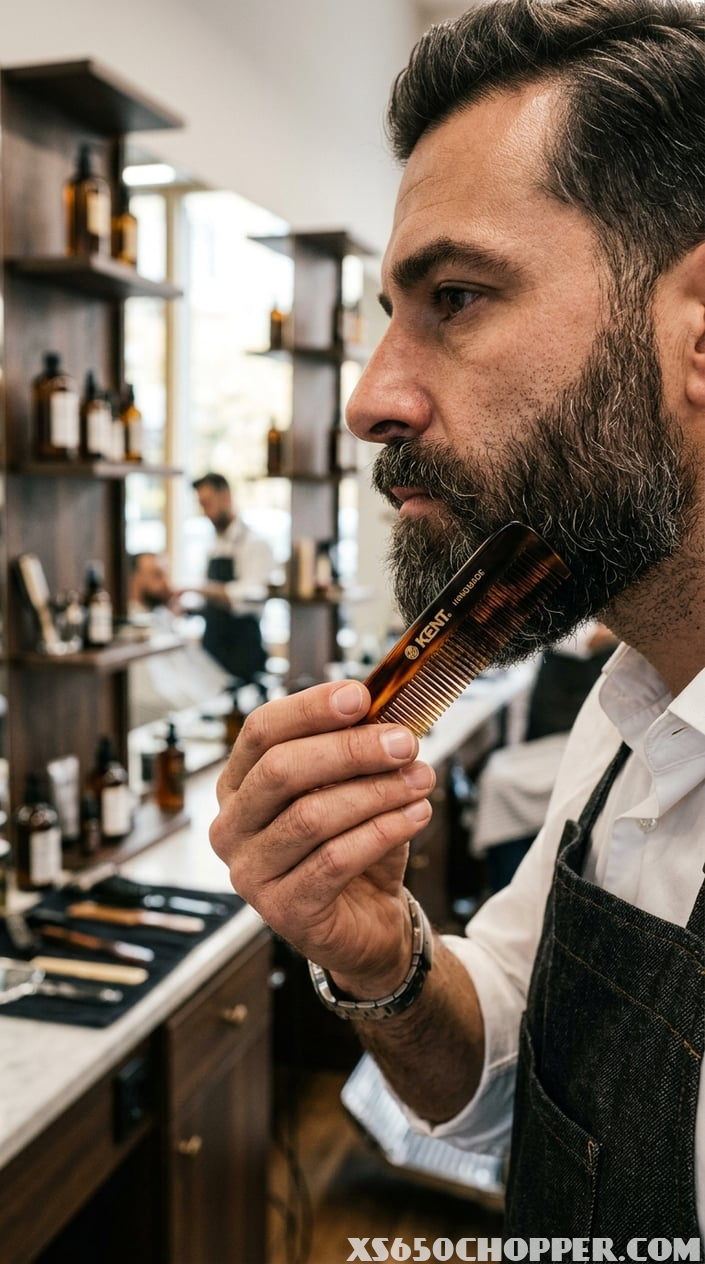
A Kent handmade pocket comb gives you precise control over the direction of your beard hairs. The saw-cut, hand-polished teeth glide without snagging, so you can shape hair without tugging.
Use the fine teeth to smooth and align short stubble, and switch to the wider side for thicker growth or to define the cheek and neckline. Work from the skin outward to train hairs to lie where you want them.
Carry the pocket comb for quick touch-ups during the day. It fits discreetly in a pocket or wallet, so you can re-sculpt after meals or before meetings.
Comb after applying a light balm or oil so the product distributes evenly and the hairs respond to the motion. That combination helps set direction and reduces flyaways while keeping your beard conditioned.
PRO TIP
When you comb, follow your growth pattern first, then gently lift and angle strands where you need shape. Repeat this daily for a few minutes to teach your beard a consistent direction.
10) ‘Less is more: shape, don’t overgrow’ — Antonio Pisterzi

You’ll get the cleanest, most sophisticated look by focusing on shape rather than length. Antonio Pisterzi emphasizes that a well-defined neckline, cheek line, and consistent density create polish without needing a bushy beard. Precision beats bulk every time.
Trim regularly to maintain the form you want. Short, frequent trims keep edges sharp and prevent stray hairs from softening your silhouette. That routine also helps skin breathe and reduces irritation under the hair.
Think about proportions to your face and hairstyle when deciding how much to keep. Let your barber guide where to taper and where to maintain fullness so the beard enhances your jawline. Small adjustments can make a big visual difference.
Use quality tools for shaping: a reliable trimmer, scissors for detail, and a comb to set the hairs before cutting. Clean tools yield more predictable results and protect the hair from split ends. Follow up with a light oil or balm to condition and settle the shape.
PRO TIP
When in doubt, start with conservative trimming and step back to check balance from different angles. You can always remove more, but you can’t undo an overcut.


